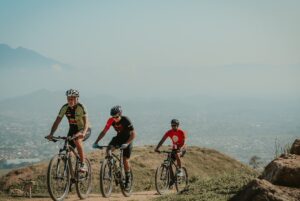
It’s time to hit the trails and explore the great outdoors with mountain bikepacking. But before you launch on your adventure, it’s imperative to have the right gear and setup to make your journey a success. From choosing the best bikepacking bags for your mountain bike to packing them strategically, we’ll guide you through the must-have imperatives for a seamless bikepacking experience. Additionally, we’ll provide tips on adjusting your bike’s suspension, selecting the right gearing, and adding extra bottle cages for long rides. Whether you’re a seasoned bikepacker or a beginner looking to explore new horizons, these tips will ensure you’re well-equipped for your next mountain bikepacking adventure.
Mountain Bikepacking Essentials: Must-Have Gear and Setup Tips for Adventure
Mountain bikepacking requires essential gear and setup tips for a successful adventure. To embark on this journey, it’s crucial to have the right equipment and knowledge. Here are some key essentials for mountain bikepacking:
- Bike Choice: Opt for a mountain bike or a gravel bike, known for their versatility across various terrains, including roads, paths, and technical tracks[4].
- Bags for Gear: Utilize different bags for efficient packing, such as handlebar bags, frame bags, saddle bags, top tube bags, stem bags, and fork bags[4].
- Protect Your Frame: To prevent damage to your bike’s frame, use frame protectors to shield it from abrasion caused by bikepacking bags[4].
- Gear Organization: Pack light and strategically, considering the terrain and trip duration. Research your route to determine the necessary clothing, sleep system, food, and water requirements[1].
- Resourceful Planning: Make use of gear you already own, borrow from friends, or explore gear-share libraries and second-hand shops for any missing equipment[1].
By following these essential tips and having the right gear, you can ensure a successful and enjoyable mountain bikepacking adventure.
Key Takeaways:
- Choosing the Right Bags: When deciding on bikepacking bags for a mountain bike, consider frame, handlebar, seat, top tube, and stem bags based on your bike’s design and compatibility.
- Packing Strategically: Ensure proper weight distribution by placing heavier items in the frame bag, bulkier items in the handlebar bag, and large, light items in the seat pack.
- Dropper Post Considerations: Dropper posts can complicate bikepacking setups, requiring specific seat packs for compatibility or using alternative solutions like minimal rear racks.
- Full-Suspension vs. Hardtail: While full-suspension bikes offer more comfort, hardtails may be more suitable for bikepacking due to space constraints and weight considerations.
- Setting Up Suspension: Adjust your bike’s suspension to the added weight of bikepacking gear, following manufacturer guidelines for increasing spring rates to ensure optimal performance.
- Easy Gearing Adjustment: Swap to easier gearing by fitting a smaller chainring for improved climbing performance when tackling steep terrain with a loaded bikepacking setup.
- Essential Kit and Adventure Planning: Pack necessary spares for potential breakdowns, protect your frame with heli tape, add extra bottle cages for more water storage, and choose your adventure wisely before setting off into the backcountry.
Mountain Bike Selection for Bikepacking
Hardtail vs. Full-Suspension Mountain Bikes
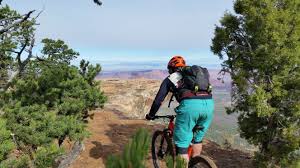
On the choice between hardtail and full-suspension mountain bikes for bikepacking, it is important to consider the trade-offs. Full-suspension bikes offer more grip and comfort on rough terrain but may have limited space for frame bags and water storage. They are also heavier, which adds to the overall weight of your bikepacking setup. On the other hand, hardtail bikes, while providing less comfort, are typically lighter and offer more space for mounting bags and hydration systems, making them a popular choice for long-distance bikepacking adventures.
The Role of Tire Choice and Width
An important aspect of mountain bike selection for bikepacking is the choice of tire width and type. Plus-size tires can provide more traction and stability on rugged terrain, making them ideal for challenging off-road bikepacking routes. Wider tires also offer better cushioning, reducing the impact of rough trails on your body, enhancing comfort during long-distance rides. Consider opting for tubeless tires to prevent flats and punctures, ensuring a smoother and more enjoyable bikepacking experience.

Considerations for Bike Frame Material
Considering the material of your bike frame is crucial for a successful bikepacking adventure. Aluminum frames are lightweight and durable, making them suitable for rugged off-road conditions. Carbon fiber frames offer vibration damping properties, enhancing comfort during long rides. Steel frames are known for their strength and durability, providing stability and reliability on challenging terrains. Each material has its strengths and considerations, so choose based on your preferences and the type of terrain you plan to tackle during your bikepacking journey.
Geometry and Comfort for Long-Distance Rides
Mountain bike geometry plays a vital role in ensuring comfort during long-distance bikepacking rides. A relaxed geometry with a longer wheelbase and slacker head angle provides stability on descents and rough terrains, reducing rider fatigue. Look for a bike with a comfortable saddle and handlebar position to maintain an ergonomic riding posture throughout your adventure. Suspension forks with adjustable settings can further enhance comfort by absorbing impact and vibrations from the trail, allowing you to focus on enjoying the journey.
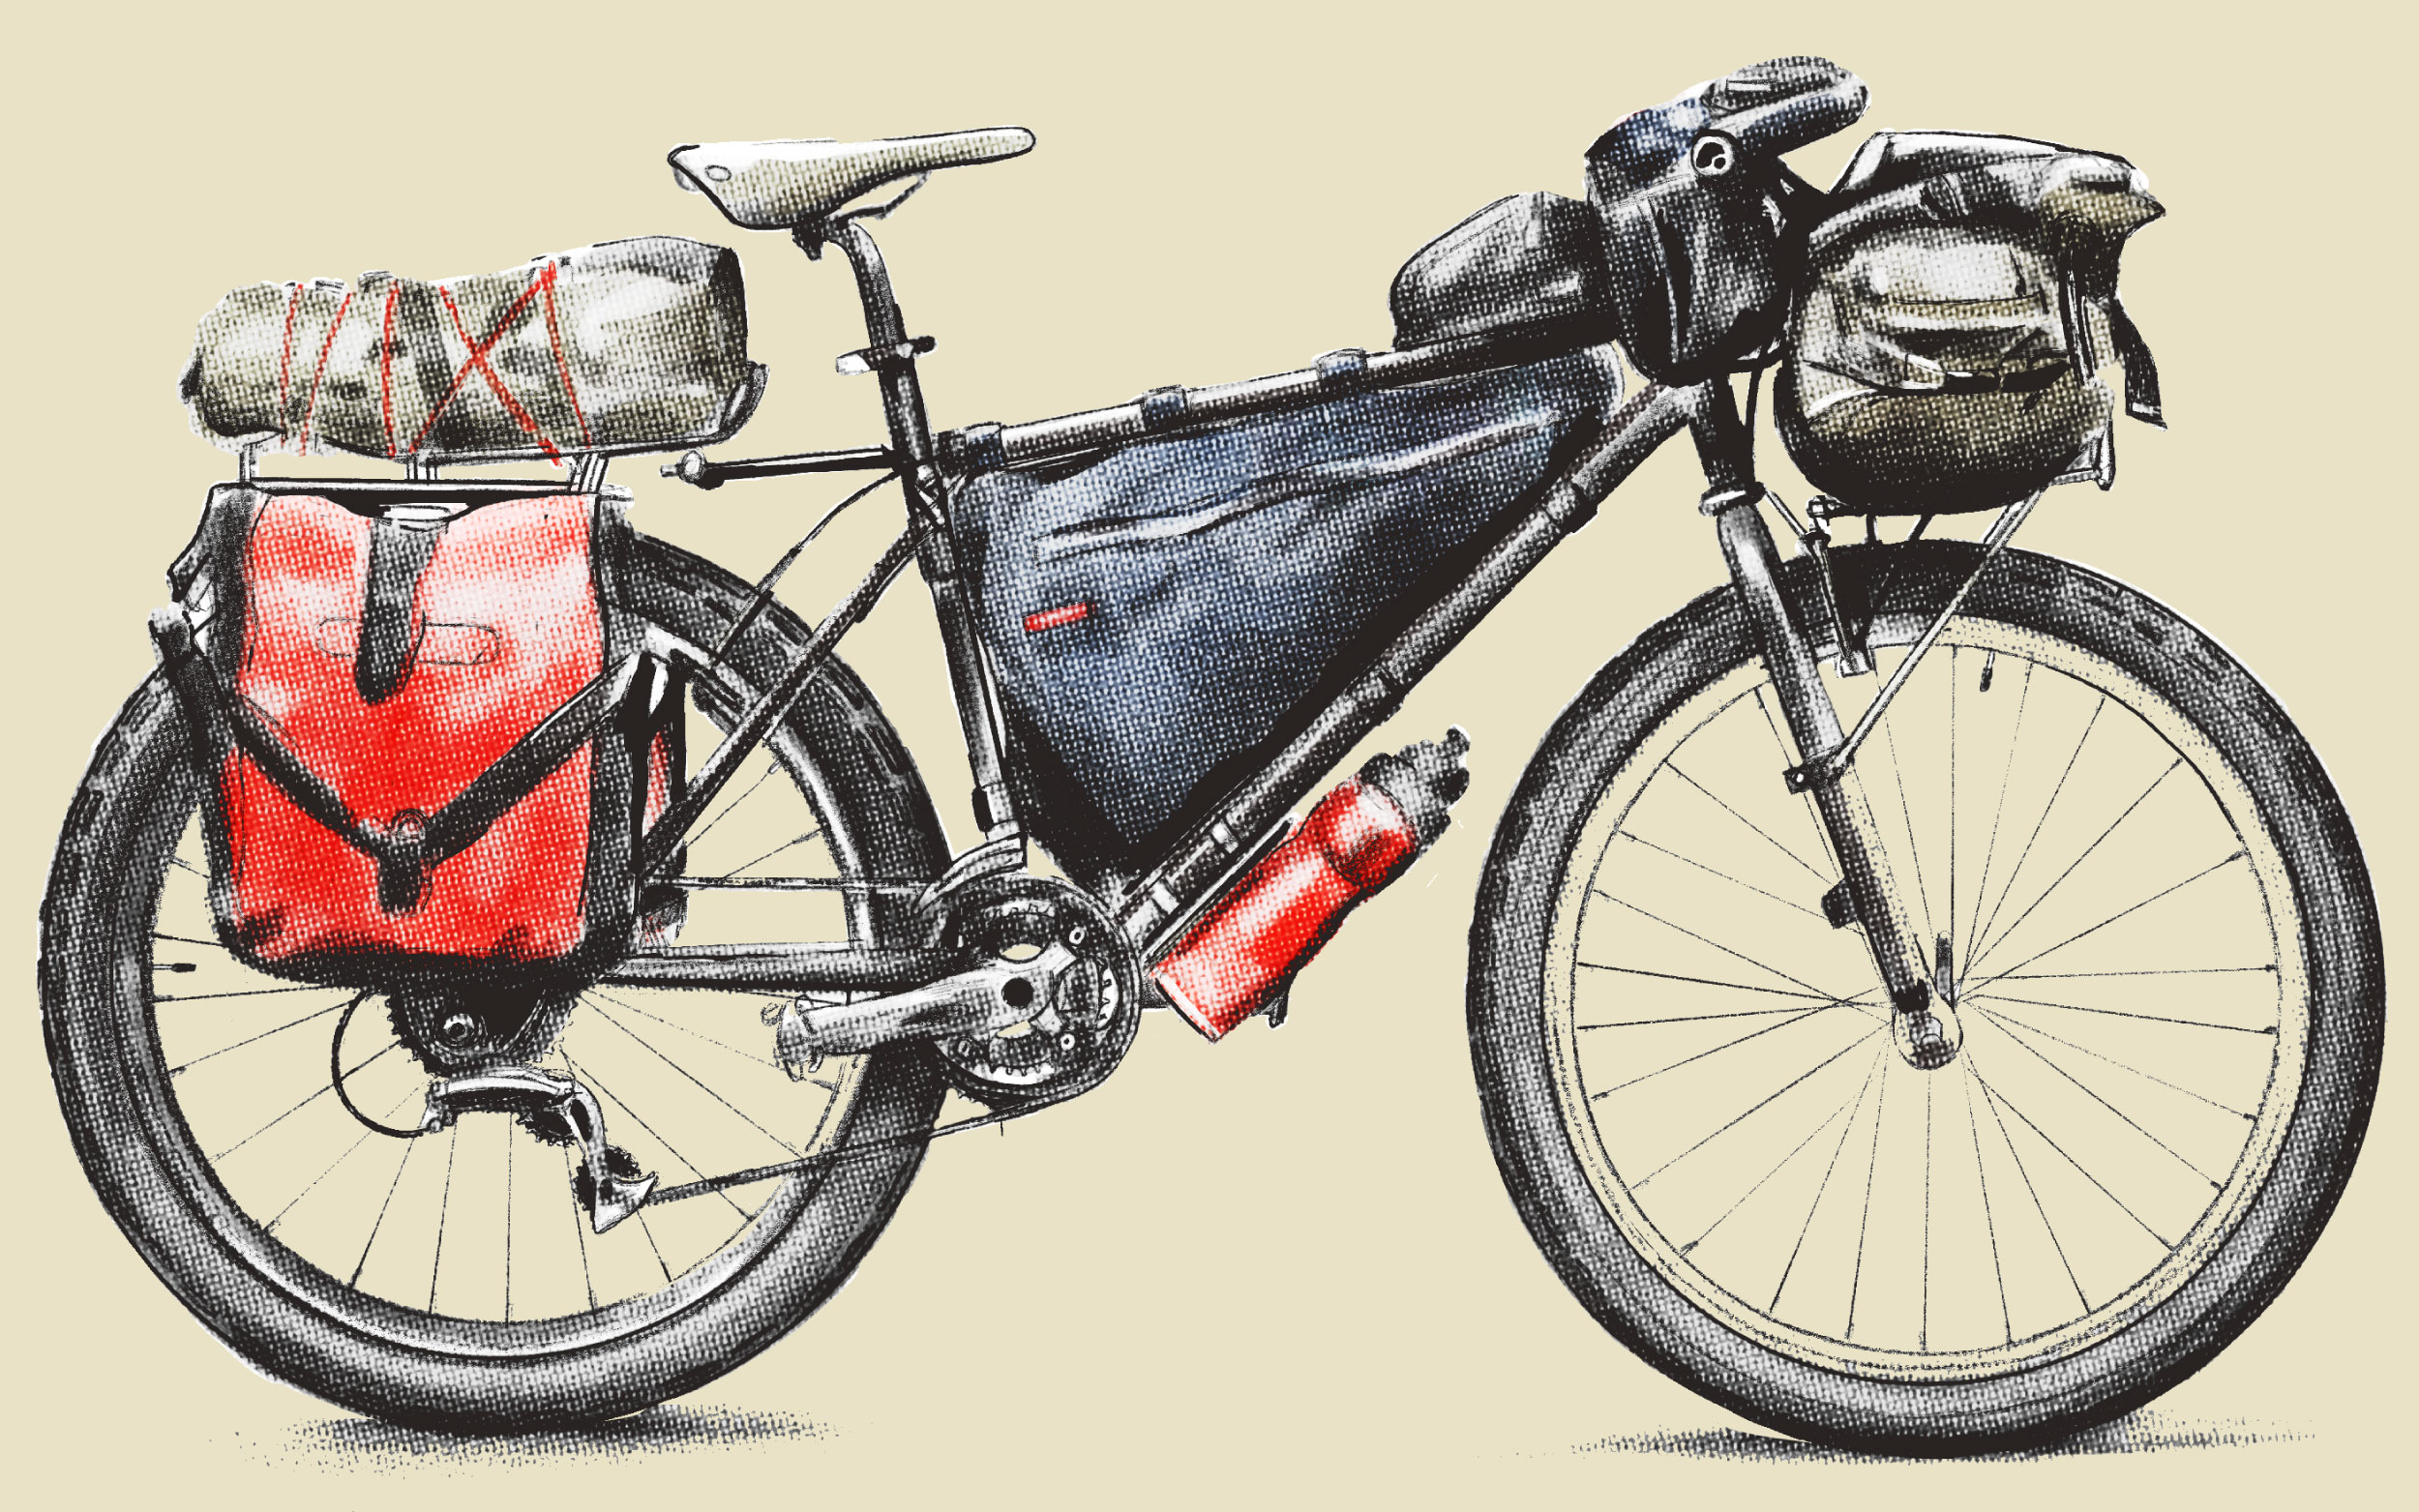
Which Bikepacking Bags are Best for Mountain Bikes?
Frame Bags
With many mountain bikes being equipped with burly components and terrain-taming suspension, choosing the right bikepacking bags is crucial for a successful adventure. In terms of frame bags, it’s important to consider the frame design of your mountain bike. Frames with curvy tubes or rear-suspension designs may struggle to accommodate larger frame bags. In such cases, opting for smaller frame bags can be a practical solution, providing space for important tools and equipment.
Handlebar Bags
Bags designed specifically for mounting on handlebars, with a harness and dry bag setup, are ideal for mountain biking adventures. These handlebar bags offer secure attachment to the handlebars while minimizing contact between the dry bag and the bike’s components. This is especially beneficial for mountain bike cockpits, ensuring clearance for brake and gear cables. Easy removal and reattachment of the dry bag make handlebar bags a convenient storage solution while riding rough terrains.
Seat Packs
Seat packs, also known as saddle bags, are great for storing large, lightweight items like sleeping bags. However, they require sufficient seat-to-rear-wheel clearance, which can be an issue with dropper posts or on smaller frame sizes. If a large seat pack is not suitable for your bike, consider using a spacious riding backpack to accommodate your gear. Proper packing and weight distribution are key for a balanced and efficient bikepacking setup.
Top Tube and Stem Bags
Packs designed for mounting on the top tube and stem of your mountain bike are versatile storage options for snacks, cameras, and small importants. Look for waterproof options to ensure the contents remain dry during your ride. These bags offer easy access to items you may need while on the trail, enhancing convenience and efficiency during your bikepacking adventure.
How to Choose and Pack Your Bikepacking Bags
The Art of Packing Light
On a mountain bikepacking adventure, packing light is key to enjoying a smooth and efficient ride. Choose versatile gear that can serve multiple purposes to minimize weight and bulk. Opt for lightweight, compact items that are vital for safety and comfort on the trail.
Weight Distribution Principles
On a bikepacking journey, proper weight distribution is crucial for maintaining balance and stability. Distribute heavier items closer to the frame, preferably in frame bags, to keep the bike’s center of gravity low. Utilize handlebar bags for bulkier items like sleeping gear, and reserve seat packs for large, lightweight vitals such as sleeping bags.
Bags with strategic placement can help optimize your bike’s handling and performance on rugged terrain. Consider the terrain you’ll encounter and choose bags that fit your bike’s frame and suspension design for a secure and stable setup.
Essential vs. Non-Essential Items
One of the most critical aspects of bikepacking is distinguishing between vital and non-vital items. Essential items include tools, spare parts, first aid supplies, and safety vitals. Non-vital items like luxury items or excessive clothing should be minimized to reduce weight and bulk in your packs.
To maximize space and efficiency, prioritize items that are necessary for survival and emergency situations. This will ensure you have the vitals without overburdening your bike with unnecessary weight.
Waterproofing Strategies
With unpredictable weather conditions on mountain bikepacking trips, waterproofing your gear is vital to protect your equipment from moisture and ensure it stays dry throughout your journey. Invest in high-quality waterproof bags and dry sacks to keep sensitive items such as electronics, clothing, and sleeping gear safe from rain and dampness.
Another tip is to use waterproof covers for additional protection, ensuring that even if your bags are exposed to rain, your gear remains dry and functional. Consider the climate and weather conditions of your route to determine the best waterproofing strategies for your bikepacking adventure.

Ride Preparation and Bike Setup
Adjusting Your Suspension for the Load
With the extra weight of your bikepacking gear, adjusting your suspension is crucial for optimal performance. Increasing the spring rate or preload to match the added weight will ensure your bike handles well on the trail. Check the manufacturer’s guidelines before making adjustments and take your bike for a test ride to fine-tune the suspension for your adventure.
Choosing Easier Gearing for Varied Terrain
One key aspect of setting up your mountain bike for bikepacking is choosing the right gearing for varied terrain. Swapping to a smaller chainring, such as a 30t or 28t, can make a significant difference in climbing efficiency, especially with the added weight of your gear. This adjustment will help you tackle steep ascents more comfortably during your bikepacking journey.
The Importance of Frame Protection
Protection is imperative when it comes to preserving your bike’s frame during bikepacking adventures. Even the most secure bikepacking bags can cause wear and tear on the frame due to movement over rough terrain. Using frame protection like heli tape on areas where bags are mounted will safeguard your bike from scratches and damage, ensuring its longevity on the trail.
Adding More Bottle Cages and Hydration Solutions
Ride with confidence by ensuring you have an adequate hydration solution for your bikepacking trip. Adding extra bottle cages to your bike frame or fork lowers is imperative for carrying additional water on multi-day journeys. Accessories like Wolf Tooth B-RAD or Topeak VersaMounts provide options to mount multiple bottle cages, keeping you hydrated during long rides off the beaten track.
Navigation and Communication Tools
GPS Devices vs. Maps
An necessary aspect of mountain bikepacking is having the right tools for navigation. An important decision to make is whether to rely on GPS devices or traditional maps. While GPS devices provide real-time tracking and accurate location data, maps can serve as a reliable backup in case of technology failure or battery drainage.
Satellite Messengers for Safety
Tools for communication and safety are crucial in remote mountain bikepacking adventures. Satellite messengers, such as SPOT or Garmin inReach devices, allow you to send SOS signals in case of emergencies and stay connected with loved ones. These devices provide a sense of security when exploring off-the-grid locations.
Mobile Apps and Offline Resources
For on-the-go navigation and information, mobile apps and offline resources can be valuable tools. Apps like Gaia GPS or Trailforks offer detailed maps, trail information, and route planning capabilities even in areas with no cellular service. Offline resources such as guidebooks or printed maps can also be helpful backups.
Power Solutions for Long Rides
Long mountain bikepacking trips require reliable power solutions to keep your navigation and communication devices charged. Power banks, solar chargers, or dynamo hubs can help you stay powered up throughout your journey. Ensuring you have sufficient power backup is necessary for a safe and successful adventure.
Shelter and Sleeping Systems
Tents vs. Bivys vs. Hammocks
On longer mountain bikepacking adventures, choosing the right shelter system is crucial. Tents provide more space and protection from the elements, but can be heavier and bulkier to carry. Bivys are lightweight and pack down small, ideal for minimalist setups. Hammocks offer a comfortable and elevated sleeping option, great for areas with limited flat ground. Consider the terrain and climate of your route when deciding on the best option for your needs.
Packing for Different Climates
Hammocks with mosquito nets are a great choice for warm, bug-filled environments, providing ventilation and protection while you sleep. With quick and easy setup, hammocks can be a versatile and lightweight option for various climates. Make sure to pack a rainfly or tarp for sudden weather changes, ensuring you stay dry and comfortable throughout your journey.
Sleeping Pads for Comfort and Warmth
One of the most important pieces of gear for a good night’s rest is a high-quality sleeping pad. In colder climates, choose an insulated pad to keep you warm and comfortable. Look for pads with an R-value that suits the temperatures you’ll encounter. In warmer weather, a lighter weight pad with less insulation can provide the necessary cushioning for a restful sleep without added bulk.
Lightweight Sleeping Bags and Quilts
Hammocks with underquilts or lightweight sleeping bags are perfect for staying warm in cooler climates. Insulated quilts offer a versatile option, providing warmth without the added weight of a traditional sleeping bag. Consider the temperature rating of your sleeping bag or quilt to ensure you stay comfortable throughout the night. Pair it with appropriate clothing layers for added warmth in colder conditions.
Clothing and Personal Gear
Layering for Variable Conditions
Variable weather conditions are a common challenge when mountain bikepacking. To stay comfortable and prepared, layering your clothing is key. Start with a moisture-wicking base layer to keep sweat away from your skin. Add a thermal layer for warmth in cooler temperatures, and top it off with a waterproof and breathable outer shell to protect against rain or wind.
The Balance Between Durability and Weight
When considering clothing and gear for mountain bikepacking, finding the balance between durability and weight is crucial. Opt for lightweight, moisture-wicking fabrics that are also durable enough to withstand the rigors of off-road riding. Look for reinforced areas in high-wear areas such as knees and elbows to ensure longevity without compromising on weight.
Footwear and Pedal Choices
Choosing the right footwear and pedal setup can make a world of difference on the trail. For mountain bikepacking, consider trail shoes or lightweight hiking boots with good grip for walking sections. Match your footwear with pedals that offer a balance of stability and efficiency, such as clipless pedals for power transfer and control on rough terrain.
Personal Hygiene on the Trail
Personal hygiene is often overlooked but vital for staying comfortable and healthy during a bikepacking adventure. Pack biodegradable soap, quick-drying towels, and wet wipes for easy cleanup. Remember to practice Leave No Trace principles when disposing of waste, and always carry a small trowel for proper waste disposal while in the backcountry.
Food and Water Management
Water Filtration and Purification
Management of water is crucial for any mountain bikepacking adventure. Ensuring a safe and clean water source is key to staying hydrated and healthy on the trail. Consider using a reliable water filtration or purification system to eliminate contaminants and bacteria from natural water sources.
Cooking Gear and Ultralight Stoves
For efficient meal preparation during your bikepacking trip, having the right cooking gear and ultralight stoves is crucial. Investing in compact and lightweight cooking equipment will help you save space in your packs while still allowing you to enjoy hot meals at the end of a long day on the trails.
Plus, choosing ultralight stoves can significantly reduce the weight you carry, making your overall biking experience more enjoyable. Look for stoves that offer quick and efficient cooking capabilities without adding unnecessary bulk to your gear.
Nutritional Considerations for Long Rides
One important aspect of food management on extended mountain bikepacking trips is ensuring you have the right nutritional balance to sustain your energy levels. Pack high-energy snacks, such as nuts and dried fruit, to keep you fueled during long rides. Incorporating electrolyte-rich drinks or supplements can also help replenish vital nutrients lost through strenuous physical activity.
Packaging and Waste Minimization
The proper management of packaging and waste is crucial for minimizing your environmental impact while bikepacking. Carry reusable food containers and utensils to reduce single-use plastic waste. Utilize biodegradable soap for cleaning purposes, and pack out all trash to leave no trace of your presence in nature.

Maintenance and Repair Kit Essentials
Multi-Tools and Spare Parts
One crucial item to have on any bikepacking adventure is a reliable multi-tool. Look for one with a variety of hex wrenches, screwdrivers, and chain tools to cover most common repairs on the trail. Additionally, carrying spare parts such as extra chain links, a derailleur hanger, and brake pads can save you from being stranded in the middle of nowhere due to a mechanical issue.
On-the-Trail Repair Tips
Essentials like a mini pump, tire levers, and patch kits are crucial for fixing punctures or replacing tubes on the go. Make sure to practice changing a tire before your trip to ensure you can do it efficiently when needed. Any additional items like zip ties and duct tape can also come in handy for temporary repairs.
- Always carry a spare inner tube
- Remember to check your tire pressure regularly
Tire Repair and Pump Options
Repairing a punctured tire is a common issue while bikepacking, so having a compact and reliable tire repair kit is crucial. Include patches, tire boots, and a quality mini pump to quickly fix flats and get back on the trail. Look for lightweight and portable options that can easily fit in your bikepacking bags without taking up too much space.
Chain Maintenance and Lubricants
Chain maintenance is key to keeping your bike running smoothly throughout your adventure. It’s important to regularly clean and lubricate your chain to prevent wear and ensure optimal performance. Invest in a high-quality chain lubricant that is suitable for the conditions you’ll be riding in, whether it’s dry, wet, or muddy terrain. It’s a small but crucial step to prolonging the life of your drivetrain and avoiding any unnecessary mechanical issues.
Dropper Post or No Dropper Post?
The Advantages of a Dropper for Bikepacking
One of the key advantages of using a dropper post for bikepacking is the improved handling on technical descents. This can greatly enhance your control and confidence on challenging terrain, making your off-road adventures safer and more enjoyable.
Compatibility with Bikepacking Gear
Dropper posts can sometimes pose challenges when it comes to compatibility with bikepacking gear. For instance, traditional seat packs may have difficulty fitting due to clearance issues with the rear wheel or interference with the dropper post mechanism. However, some manufacturers offer specialized seat packs designed specifically for dropper post setups.
Adjusting Riding Style with a Dropper Post
Adjusting your riding style when using a dropper post for bikepacking can enhance your overall experience. By utilizing the dropper post to lower your saddle on technical descents, you can improve your bike’s maneuverability and stability, allowing you to tackle challenging terrain with more confidence.
Health, Safety, and Environmental Considerations
First Aid Knowledge and Kit
The key to a successful mountain bikepacking adventure is to prioritize safety. Ensure you have a comprehensive first aid kit and the knowledge to use it effectively. Accidents can happen in remote areas, so having the right supplies and skills can make a critical difference in emergencies.
Understanding and Mitigating Risks
For a safe and enjoyable bikepacking experience, it is crucial to understand and mitigate risks. Familiarize yourself with the terrain, weather conditions, and potential hazards along your route. Always ride within your limits and be prepared for unexpected situations by carrying crucial supplies and knowing how to react.
Mountain bike bikepacking will get you as far off the beaten track as you can go on two wheels. It is crucial to be aware of potential risks such as navigational challenges, mechanical failures, and injuries. By understanding these risks and having a plan to mitigate them, you can ensure a safe and rewarding adventure.
Leave No Trace Principles
Any outdoor enthusiast must adhere to the Leave No Trace principles to minimize their impact on the environment. Respect wildlife, stay on designated trails, and pack out all waste. By following these guidelines, you can help preserve the natural beauty of the wilderness for future generations.
It is estimated that over 40% of Americans participate in outdoor activities each year, leading to significant impacts on natural spaces. By practicing Leave No Trace principles, you can reduce your ecological footprint and protect the environment for wildlife and other visitors.
Planning Your Adventure
Route Planning and Logistics
Adventure starts with meticulous route planning and logistical considerations. Take into account the terrain, distance, and difficulty level of your chosen route. Ensure you have access to water sources and plan your resupply points accordingly. It’s crucial to have a clear understanding of the logistics involved in reaching your destination and returning safely.
Weather Forecasting and Seasonal Adjustments
For optimal preparations, stay ahead of changing weather conditions by regularly checking forecasts. Adjust your gear and clothing according to the seasonal variations you may encounter during your bikepacking journey. Be prepared for unexpected weather changes by packing layers that can easily be added or removed to ensure comfort and safety on the trail.
Planning your adventure with a keen eye on potential permits, regulations, and local customs is crucial to a smooth and enjoyable experience. Research the specific requirements of the areas you plan to visit, ensuring compliance with any necessary permits and regulations. Respect local customs and traditions, fostering positive interactions with communities you encounter along the way.
Permits, Regulations, and Local Customs
Customs, permits, and regulations play a vital role in shaping your bikepacking experience. Be proactive in obtaining any required permits for your chosen route to avoid any legal complications. Familiarize yourself with the regulations of the areas you’ll be traveling through, respecting the environment and wildlife. Embrace local customs to connect authentically with the communities you pass through, leaving a positive impact behind.
Community and Solo Travel Dynamics
Planning for community and solo travel dynamics is key to a successful bikepacking adventure. Consider the benefits and challenges of traveling solo versus in a group. Solo travel offers freedom and personal growth, while group travel provides safety and shared experiences. Embrace the dynamics of both to create a memorable and enriching bikepacking journey.
Building a Bikepacking Community
Engagement with Local Groups and Online Forums
Groups within your local community can provide valuable insights, tips, and even potential riding buddies for your bikepacking adventures. Online forums dedicated to bikepacking are also great sources of information and can connect you with like-minded individuals who share your passion for exploration.
Sharing Experiences and Stories
For many bikepackers, sharing experiences and stories is an integral part of the adventure. Whether it’s through social media, blogs, or in-person meetups, recounting your adventures can inspire others to commence on their own journeys. It also fosters a sense of camaraderie within the bikepacking community.
Sharing experiences and stories with other bikepackers can also provide valuable insights into gear, routes, and trail conditions. It creates a platform for exchanging tips and tricks, building a sense of community among fellow adventurers.
Advocacy and Trail Maintenance Contributions
Community involvement goes beyond just riding together – it also includes advocating for trail access and contributing to trail maintenance efforts. By actively participating in these initiatives, bikepackers can give back to the trails that provide them with endless opportunities for adventure.
Maintenance contributions, such as trail clean-ups and repair work, are crucial for preserving and enhancing the trail network for future generations of bikepackers. These efforts help ensure that the trails remain accessible and enjoyable for all outdoor enthusiasts.
Final Words
Summing up, mountain bike bikepacking offers a thrilling way to explore remote locations and tackle challenging terrain. With the right gear and setup tips, you can begin on multi-day adventures with confidence. From choosing the best bags for your mountain bike to adjusting suspension and gearing, preparing your bike for bikepacking is important. Remember to pack important items, protect your frame, and stay hydrated with additional bottle cages. By following these guidelines, you can enjoy the ultimate off-road bikepacking experience. So gear up, hit the trail, and get ready for an unforgettable adventure into the great outdoors.
FAQ
Q: What is mountain bike bikepacking?
A: Mountain bike bikepacking involves using mountain bikes to venture off-road on multi-day adventures, carrying all necessary gear on the bike itself.
Q: Why are mountain bikes preferred for bikepacking?
A: Mountain bikes are preferred for bikepacking due to their burly components, traction-boosting tires, and terrain-taming suspension, making them suitable for demanding off-road terrains.
Q: What are the best types of bags for mountain bike bikepacking?
A: Frame bags, handlebar bags, seat packs, and top tube/stem bags are popular choices for mountain bike bikepacking, each serving different storage needs.
Q: How should one pack their bikepacking bags for optimal performance?
A: Proper weight distribution is key when packing bikepacking bags. Heavier items like tools and water should go in the frame bag, bulkier items in the handlebar bag, and light, large items in the seat pack.
Q: What are the considerations for using a dropper post in mountain bike bikepacking setups?
A: Dropper posts can complicate bikepacking setups due to clearance issues with seat packs. Special dropper-compatible seat packs or minimal rear racks can be used to address this concern.
Q: How should one adjust their mountain bike suspension for bikepacking?
A: With the additional weight of bikepacking gear, adjusting the suspension is necessary. Consult the manufacturer’s guidelines for adjusting the suspension setup to accommodate the added weight.
Q: What important gear should one carry for mountain bike bikepacking adventures?
A: Essential gear for mountain bike bikepacking adventures includes spares for punctures or mechanical issues, camping equipment, appropriate clothing, and ample water and food supplies.
Citations:
[1] https://bikepacking.com/bikepacking-101/pack-list/
[2] https://bikepacking.com/bikepacking-101/
[3] https://www.youtube.com/watch?v=Qc75_mTma40
[4] https://www.allmountainstyle.com/blogs/news/bikepacking-101-part2
[5] https://bikepacking.com/bikepacking-101/setups/